Interface description
The Your Calendar application displays the calendar in the form of a table with a view of the days of the month. Each table row is one calendar item. Each day of the month has its cell in which the main event appears. In the picture below you can see the calendar from the demo version which can be found on the About page. There are 3 types of items defined: employee, company car and announcment. 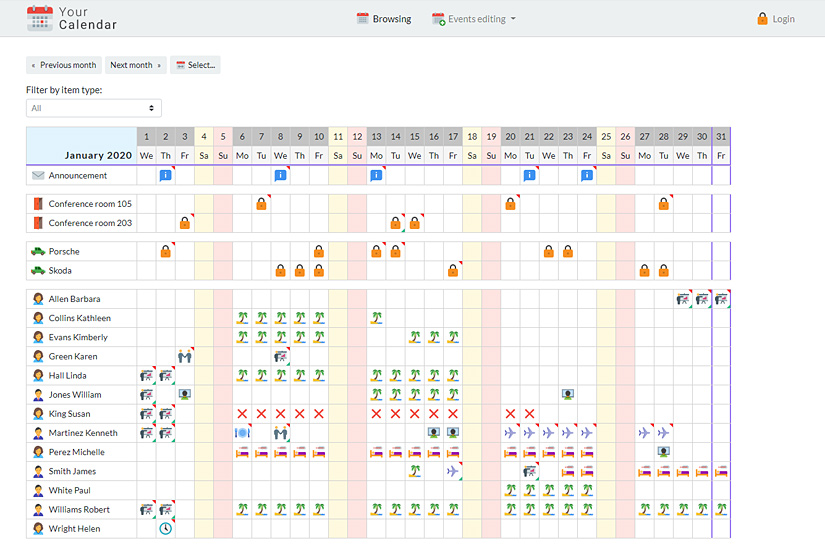
Hovering over the cell of the day will display the name of the event, and other events on the day if there are any with descriptions. 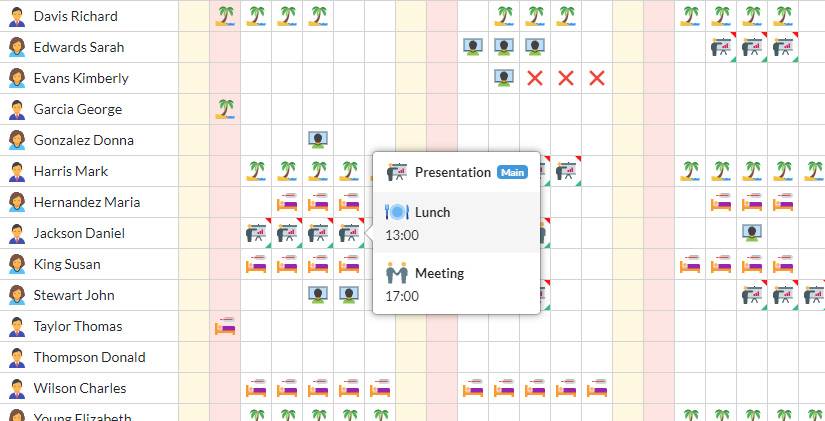
In the upper part there is the main menu. Depending on the permissions granted to the currently logged in user or users not logged in, various options may be displayed there, such as: events editing, manage, etc.
For more details, read the section: Basic concepts.
Basic concepts
Calendar items
Calendar items are dispayed as rows in the calendar. The item has its name, icon and any number of fields that describe it, e.g. text boxes, photo or link. Each item has its own type, which defines how it should look. Each item can have different user permissions. You can decide whether users will be able to edit the item's fields, change its name, or see the events of the selected item on the calendar, descriptions of these events, etc.
Item types
The type of calendar item defines how calendar item should look like:
- Which icons will be available to select for the calendar item icon.
- What events will be used by this item. For example, for an Employee, these can be events: a meeting, lunch, holidays, and for a reserved car: a reservation or a stay in the service.
- What fields of descriptions of these events are to be included in the calendar, e.g. in the case of reservations, they may be the client's hours and number, or in the case of a calendar with employee delegations, the purpose of their travel.
Event types
An event is one calendar entry. Each event is represented by its icon, making it easy to recognize what it is about. You can add any number of events on a given day of the month, but only the event that you mark as the main on a given day will be visible in the calendar day cell. The whole list of events will be displayed when you move the mouse over the selected day in the calendar. You can add descriptions to the events, and what descriptions they should be and who will see them, you can decide yourself using the appropriate permissions.
Users
Users are people who can log in to the application. The logged in user, depending on permissions, can have access to different sections, see various items and calendar entries.
Permission groups
Permission groups are used to grant permissions to many users at the same time. You can create a group and add users to it. You can also edit the Not logged in users group in which you decide what permissions are assigned to users who are guests.
Installation
For proper operation of the application you need a server that meets the following requirements:- PHP 8, maximum 8.3
- PHP extension: intl and GD or Imagick
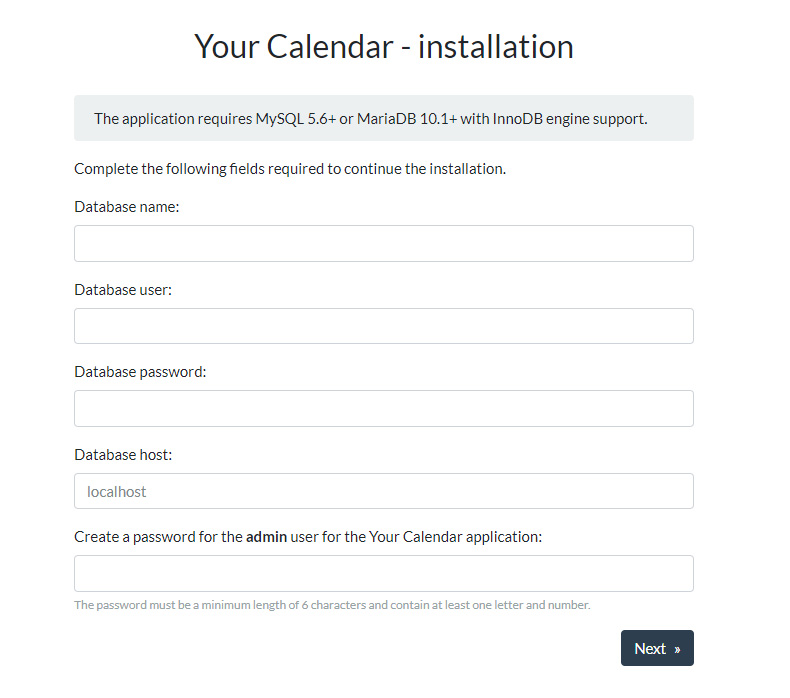
- MySQL 5.6+ or MariaDB 10.1+ database with InnoDB engine support
- Connect to your FTP server using any software (FileZilla, Total Commander) or upload the files in your server's service hosting pane and copy all the files and folders from the "Your Calendar" directory that are in the .zip package which you downloaded from CodeCanyon.

- Grant write permissions to the following files and directories:
application/config/database.php

						application/cache

						application/logs

storage - Open your browser and go to the address leading to the directory where you uploaded the files. The installer language selection page will be displayed. Choose the language that is right for you.
-
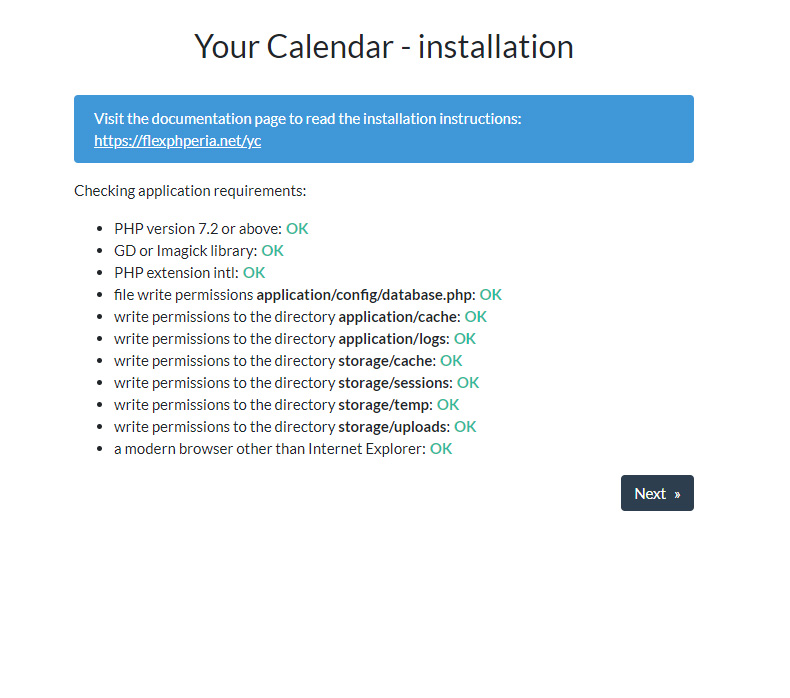
In the next step, the server will be checked for application requirements. If all went well, press the Next button.
-
Fill out your database data needed for installation, and create an administrative password for the application and press Next.
-
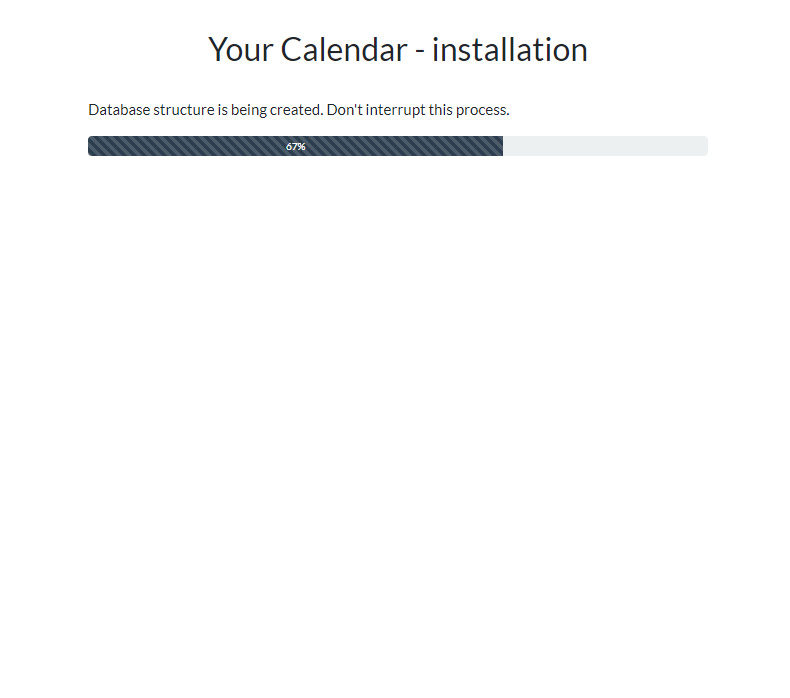
The installation process can take several dozen seconds.
-
After successful installation you will be asked to remove the "installer" directory. Delete it and refresh the page.
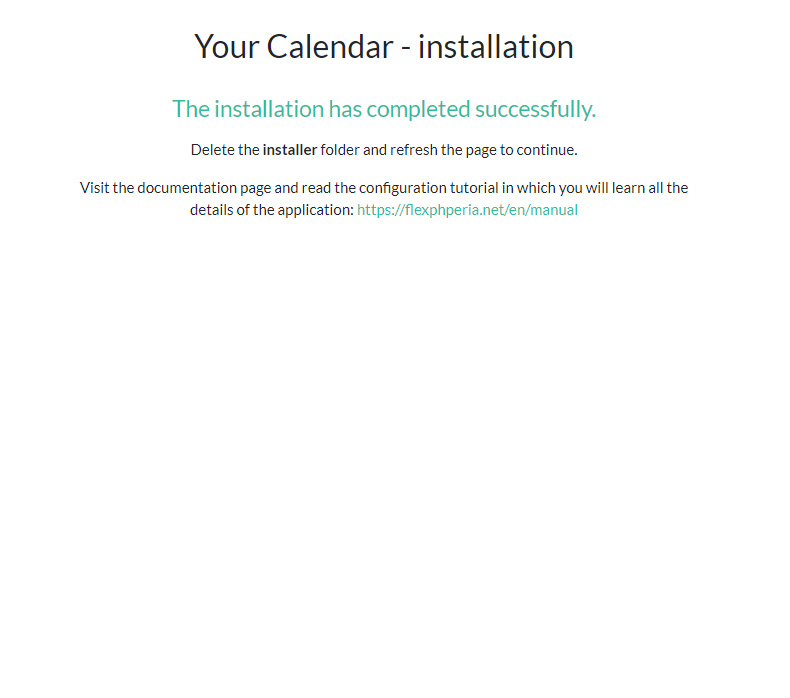
- The application has been installed :)
Configuration tutorial
In this tutorial, we will create a company calendar for marking employee absences and booking company cars.
All key aspects of configuring the calendar will be described here, from creating types of calendar items to giving permissions to unlogged and logged in users.
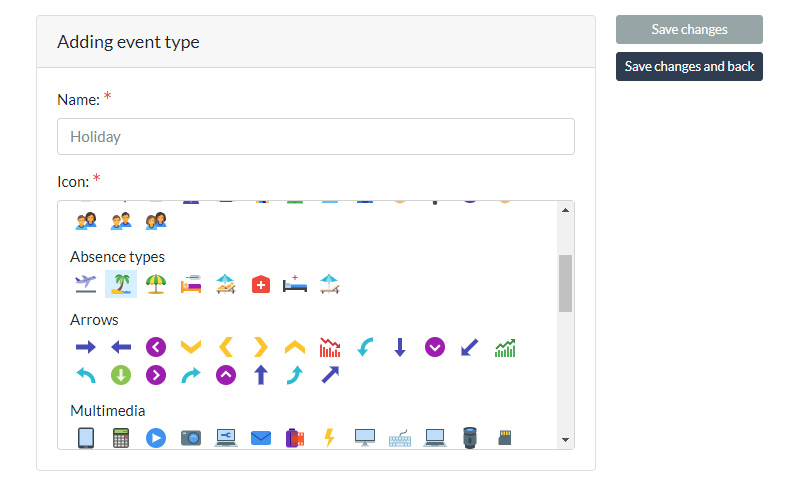
Adding event types
Log in to the calendar as an administrator and select from the top menu: Manage - Event types.
We will create 3 types of events that will be used in our calendar: holiday, remote work and reservation.
The first two will be used to indicate the absence of employees, and the last one will be used to indicate the reservation of company cars.
So keep clicking Add event type... and create 3 types by selecting the appropriate icons for each event.
Adding calendar item types: employee and company car
Now we need to create 2 types of calendar items: employee and company car.
Select from the top menu: Manage - Calendar item types and click Add calendar item type.
First, let's create a type called "Employee". We want the employee to have several fields that describe his details: department, phone number, photo and email address.
- In the name field, enter: Employee
- In the icons field, select several icons. These icons can be selected by editing employee details. For example, you can choose a male and female icon, thus creating an employee we will be able to set the appropriate gender icon.
- In event types, select holiday and remote work. We created these two types of events earlier and only these items of our type will be able to use.
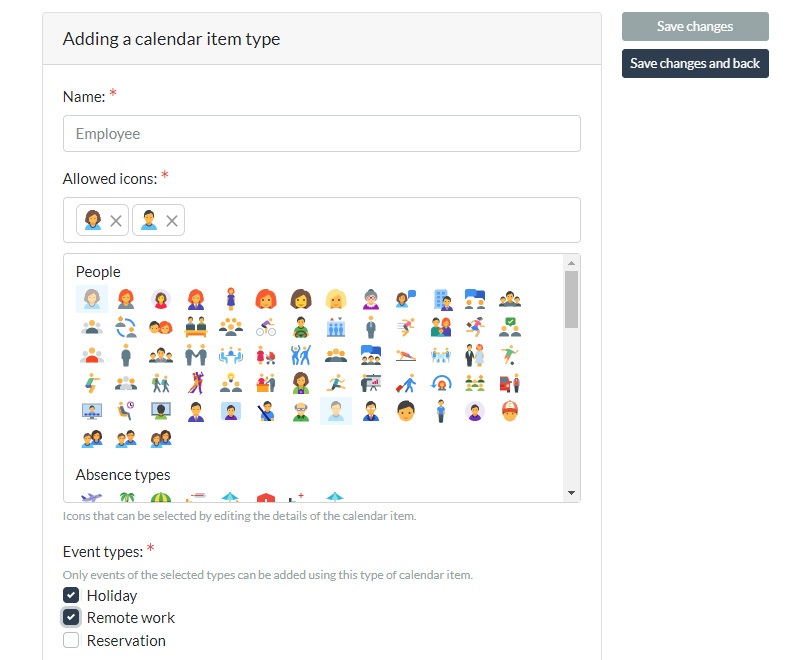
- In the event description fields, we can decide what description fields will be displayed when we add events for an employee. In our case, we want the label for description field 1 to be "description:" and description field 2 to be disabled. What you use these descriptive fields for depends only on you, e.g. you can set that description field no. 1 is a public field (this will be further on when granting permissions) and description field no. 2 is a field available only to specific logged employees. In this way, descriptions of some events can only be seen by logged-in people, e.g. descriptions of boss meetings.
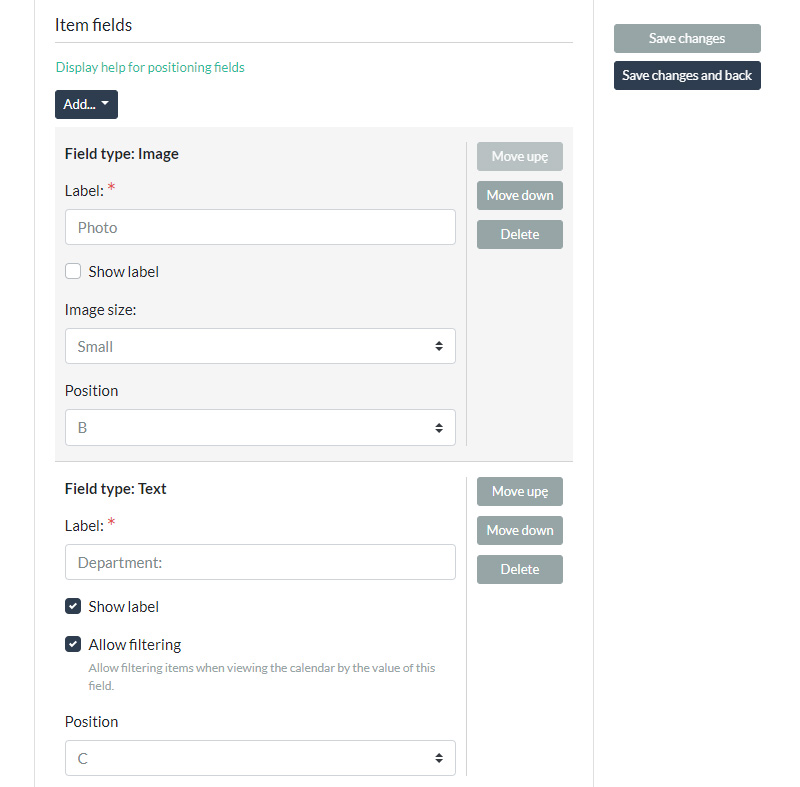
- In the Item fields section we will add 3 fields: department, phone number, photo and email address.
- Add a photo field and select its position as B. We will set all fields so that the photo is displayed on the left and the department and other fields on the right (click the help button for field positions to read more).
- Add a field of type text and set its label as "Department:", also check the boxes Show label and Allow filtering . Thanks to this, the employee department will have the inscription "Department:" and by browsing the calendar you will be able to filter and display employees of only the selected department.
Select position C for this field, thanks to which the department will be displayed next to the employee's photo. - Similarly to the field department, add the field to the phone number but do not select filtering.
- The last field will be the email field. Add a link field with the same options as the phone number field and the appropriate label.
- That's all, save the changes. Your calendar item type has been created.
The second type we need is a company car. Go to adding a new type and follow the instructions:
- In the name field, enter: Company car
- In the icons field, select one car icon. We don't need more than one, but of course you can select several of them to assign a different icon to each car.
- In event types, select reservation. Only these types of events will be added for cars.
- In the description fields set field 1 label as "Booking person:" and field 2 as "Purpose:". Check the boxes Show label for description field 1 and 2. Uncheck the Disable description field 2 for viewing and editing events and select in the Displaying the contents of the description fields: One below the other.
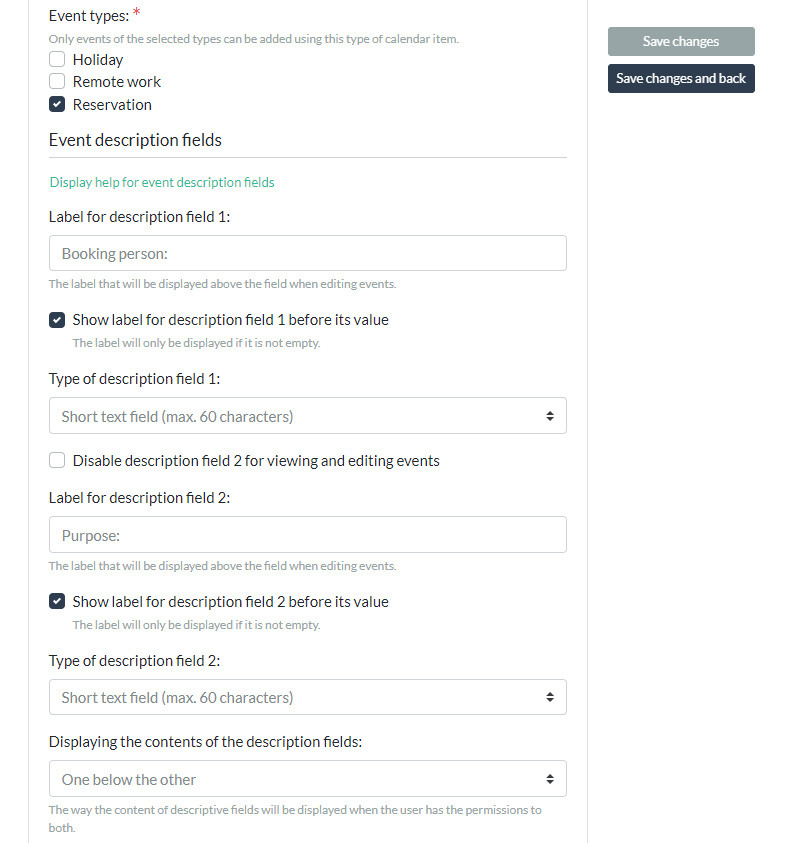 By configuring fields like this we will see at the event who booked the car and for what purpose. In addition, by setting the permissions later, we reserve that only the user who adds the reservations see our "Booking person" field, and all not logged users will see the purpose of the reservation.
 - We will skip the Item fields section, we don't need additional descriptive fields for our company cars. Of course, you can add different fields, e.g. color, additional comments or anything else that comes to your mind.
- That's all, save the changes. Your calendar item type has been created.
Return to Manage - Calendar item types and move the "Company car" over the "Employee" type so that the calendar displays cars at the top and employees below.
Creating calendar items
Now it's time to create several employees and company cars.
Choose Manage - Calendar items from the menu and start clicking Add calendar Item and selecting Employee. Add at least 2 different employees from different departments so that you can later test the filtering while viewing the calendar:
- Fill out the employee's surname and first name, select the appropriate icon, enter the department, add a photo.
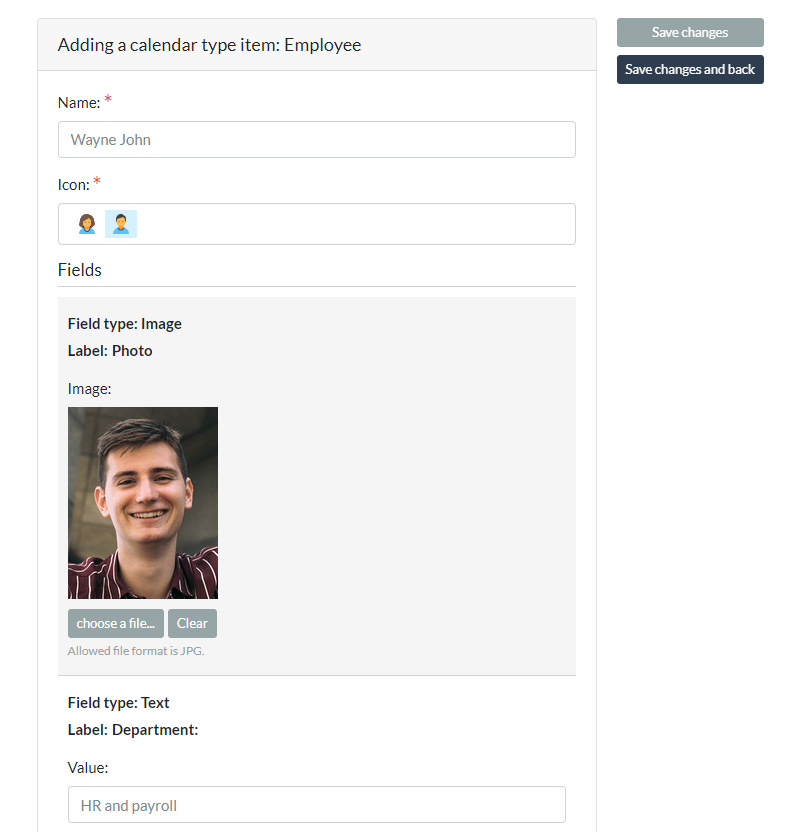
- When adding value to the "Email" field in the link field before the employee's address, add "mail:" so that after clicking on the email link the default mail client will open.
The next step will be adding company cars. The procedure is simple as you did with the employees. Add some company cars.
Granting permissions and creating users
Due to the fact that our sample calendar will be used in the company, we want every employee to be able to edit employee events without logging in.
- Select Manage - Permission groups from the menu and select the group Not logged in users.
- Here you can assign any permissions to users who are not logged in. Browse the individual options to learn more.
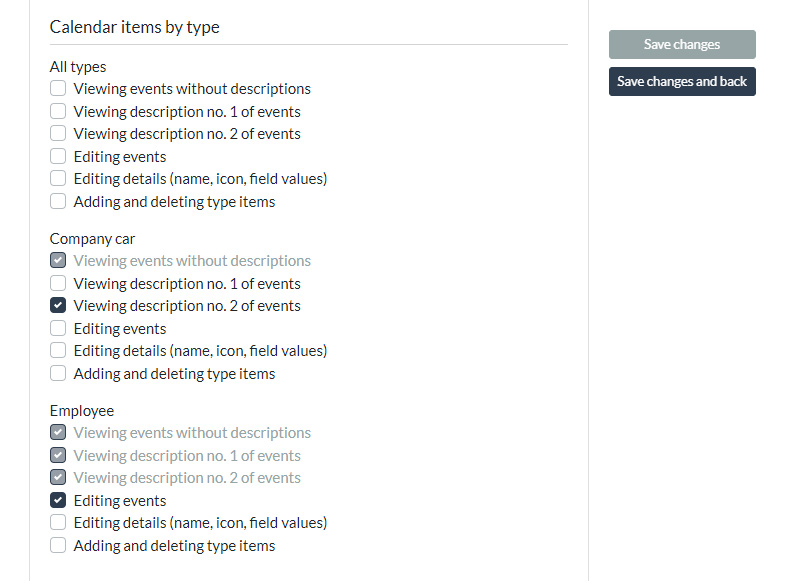
- In the Calendar items by type section, check the Editing events box next to "Employee" type. Thanks to this, all unlogged users will see employee events and will be able to edit (add, delete, change) them.
- For the "Business car" type, check the box Viewing description no. 2 of events. As we mentioned earlier, we want every employee to be able to see car reservations and the "Purpose" field (description field no. 2) which we created in the item type but we do not want to see the "Booking person" field (description field no. 1).
Now it's time to create permissions for the person who deals with booking business cars. We will create a "Secretariat" permission group, in which permissions we will allow to edit car events and assign a new user to it with the login "tom".
- Select Manage - Permission groups from the menu and click Add group ....
- In the Name field, enter: "Secretariat"
- For the "Business car" type, check the Editing events box. Thanks to this, everyone who is in the "secretariat" group will see the events of company cars (with both descriptions) and will be able to edit them.
- Go to Manage - Users and click Add User....
- Create a user with login "tom".
- Go to Manage - User permissions and select the newly created user and in the permission groups select the group Secretariat. In addition to adding a user to groups, you can select any other permissions for him.
That's all. Note that in places where you add permissions, you can even grant permissions to individual calendar items. For example, you can set permissions so that all employees can see other people's events, but everyone has their own login and can edit only their events.
Adding and viewing events
And we reached the last stage. Now the coolest - view and add events.
Log out of the administrative account and go to browsing. As you can see nothing is displayed. This is because no employee or company car has calendar events. Rows with items that have no events do not appear on the calendar by default. You can change this option in the application settings. There you will also find some interesting other settings.
Let's add events to employees:
-
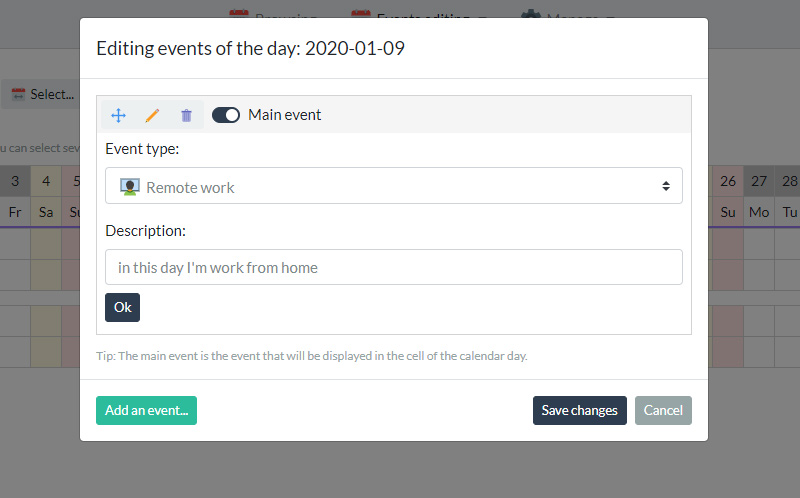
Go to Events editing and click on any cell of the day for any employee. In the window that appears, you can add events, edit their descriptions, set the order and mark which event is the main event.
When you add several events on one day, the main event is the event that will be displayed in the calendar day cell. - Next, test this functionality. Add different events to employees from different departments.
- Once you have added enough events, go back to browsing the events and see that your events are already there :)
- Hover over the cells to see events and descriptions (if you added them). Also hover over the employee's name to see his photo and other details.
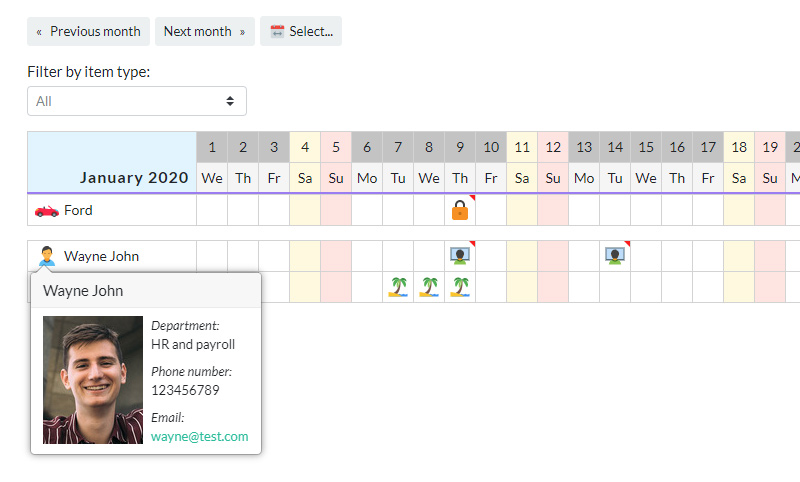
- Use the Filter by item type field, select the type Employee and then select the employee department. Only those who are in the selected department will be displayed.
Time to book cars:
- Log in with the previously created login "tom" to the calendar.
- Go to events editing and click on the cell of any day at the selected car. Add a booking event and fill in the fields for "Booking person" and "Purpose".
- Now go to browsing events and see how the added event is displayed.
- Due to the fact that the user with the "tom" login has the right to edit company car events, he also sees both descriptions of these events (Booking person and Purpose).
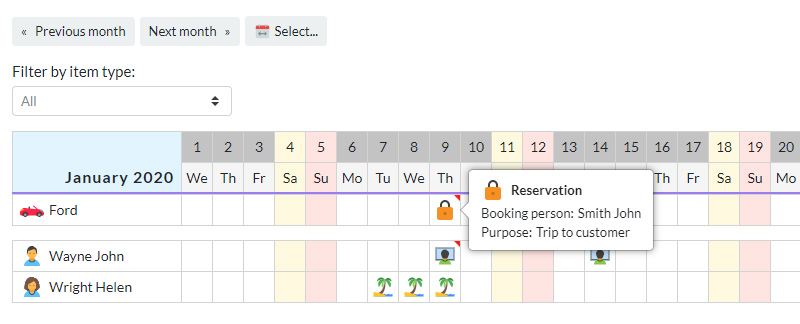
- Log out of the "tom" account and see how company car booking events look. Tada! unlogged users only see description "Purpose".
It's all. Thanks to this tutorial, you learned all the details of the application. Now you can create your own calendar tailored to your needs.
Adding custom icons
You can add your icons in SVG format so that you can use them in the application. Please follow the two steps below:
-
Open the file for editing: application/config/yourcalendar.php
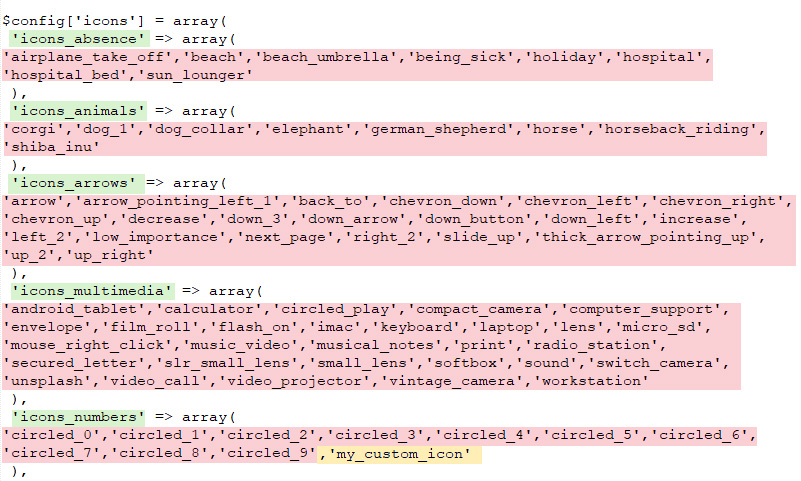
At the very end of the file there is a list of used icons. The icons are divided into internal categories (marked in green).
The individual names of the icons are marked in red. These names are not displayed in the application but are used internally and must be unique (cannot be repeated in any category).
Add the name of your icon to the selected category, as shown in the picture (marked in yellow). Successive icon names must be separated by a comma.
-
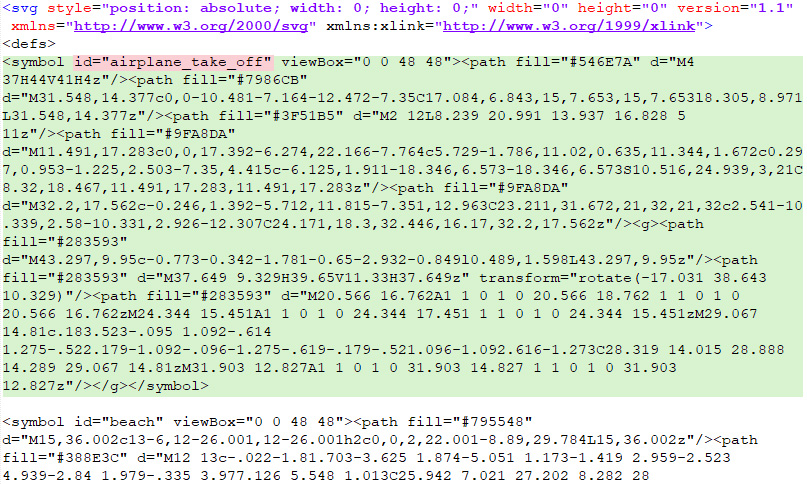
Open the file for editing: application/views/parts/svg_icons.php. This file contains the SVG code of all icons.
The code for each SVG icon is between <symbol> and </symbol> (shown in green). Note that each icon has a viewBox parameter but no width and height parameters. You need to prepare your icon code in the same way.
Name of the icon is in the id parameter (marked in red).
Add your icon code with the name you added in the previous step to the end of the file under the other icons.